Therapeutic Art Activities – Batik

My sister and I on our trip to Bali. One of the volcano calderas behind us
On a trip to Bali for a much needed break from my unpaid Carer duties, I decided to look into therapeutic art activities – Batik – in particular, that I could try while over there. I’ve always understood how therapeutic art and craft can be, so I jumped at the chance to learn something new.
My sister had visited Bali a number of times and while we originally were planning to do a cruise together, we ended up choosing to go on a trip to Bali instead. She was my Bali Tour Guide, or “BTG” as she was affectionately called. It’s always handy to go on a trip with someone who knows their way around and she didn’t disappoint me with her suggested places to go and things to see.
When thinking about what we would do on the trip, I thought it would be a really nice experience to try something specific to the culture, something I had never done before, and perhaps would not likely have ever tried had I not been in Bali. I was really happy with my choice to experience the art of Batik. We all hear about the markets and people often buy clothing or art pieces with a Batik design, but to do it ourselves, now that would be something!
You Can’t Beat A Genuine Cultural Experience
Arma Art Gallery Entrance, Ubud, Bali
If you want a true cultural adventure, Bali is an amazing place to go. You can try so many different things and there are quite a variety of choices in where you can go. Be it cooking classes, visiting temples, walking through the rice paddies, seeing shows, surfing, beachcombing, shopping at the markets, arts and craft, eating, sampling Bintang, Kopi luwak (cat pooh) coffee, yes it’s a thing, did I mention eating? There’s truly something for everyone. I’m so glad that my sister and I shared this wonderful holiday together and hope one day to be able to do it again.
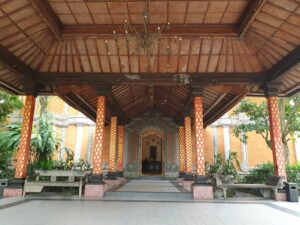
What Better Place to go to Learn Batik than an Actual Art Museum!
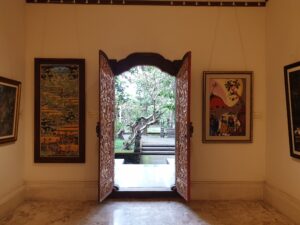
Arma Art Gallery, Ubud, Bali, looking out from the gorgeous carved doors of one of the galleries onto the beautiful grounds
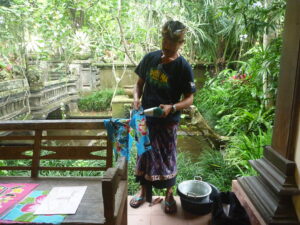
As we were staying in Ubud we booked a class at a local art museum, I believe it was called Arma, for our introduction into this wonderful form of art. We attended the class, which was run by a local artist, in an open aired undercover part of the gallery foyer, which added a unique overtone of creativity in terms of doing a genuine form of art in an actual art gallery. We were glad that there were not many visitors this day to the gallery otherwise we might have been part of their foyer display. To be honest, it didn’t even feel like we were in the foyer because it was quite large and there were a few rooms or partitioned areas.
We couldn’t have been happier. It was one of the most pleasant memories and times of my trip and one that I will always treasure. Plus, we had some special sisterly time, got to be artists for a few hours and to be honest, we were pretty impressed by our efforts and the quality of work we produced. It was frame-worthy that’s for sure and now mine sits on display in my home as likewise my sister’s is on display in hers.
Entering the World of Batik!
I don’t know if I can recall the exact procedure or materials used, but I will do my best to give you a rundown of the start to finish process of our Batik project and the end result. I can’t see myself teaching a proper class on it, but I could certainly see myself giving it another try one day at home, perhaps even including a class in our homeschool with my eldest granddaughter who loves all things art and craft. I’m not sure if I would be able to procure all of the genuine materials here in Australia but I would find a way to work with what I came across.
Update: Amazon have a good range of the supplies needed, even some of those items I thought might be difficult to obtain. I have provided links to them as they are discussed in the article for those of you interested in looking further into trying Batik for yourselves.
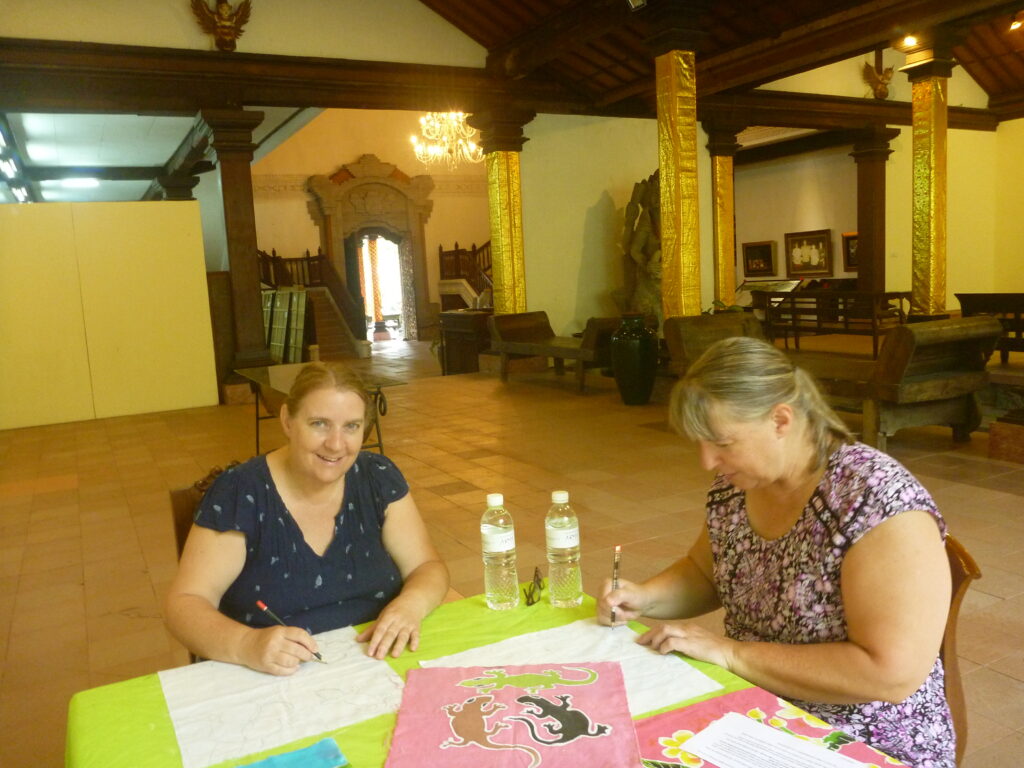
The beginnings of a masterpiece! My sister and I begin to draw our designs.
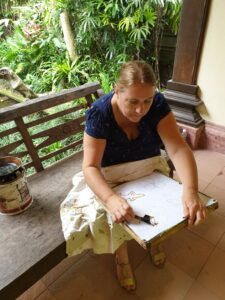
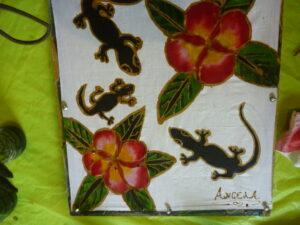
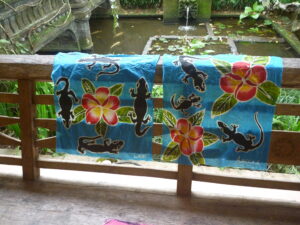
My sister and I, after looking at some example designs, decided upon our own designs. Here we are as we begin our very first efforts at drawing on the fabric. Funnily enough, we both chose to use geckos and frangipanis, but our designs were slightly different.
The Materials Required for this Version of Batik:
The materials used were mostly quite basic except for the special wax pen and heating method for keeping the wax warm.
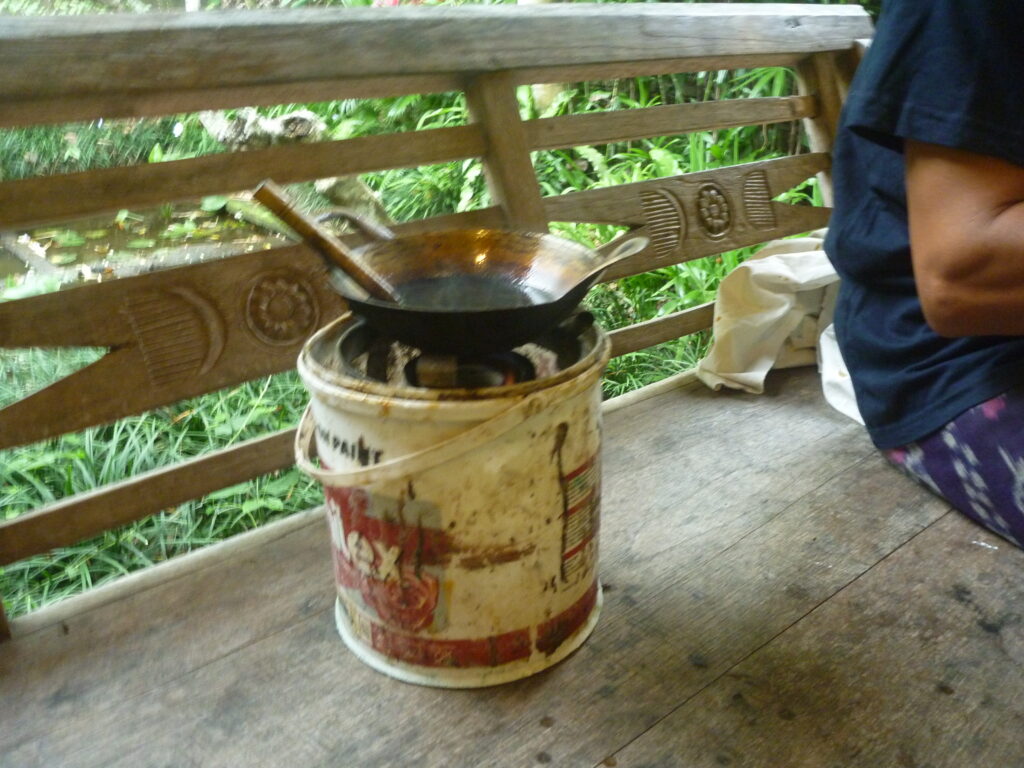
The unit for heating the wax and keeping it at just the right temperature
- Fabric
- Frame to hold the fabric tightly in place. Here’s a link to a range of frames tailored to your needs.
- Drawing pins (thumb tacks) for securing fabric to frame
- Wax slab or wax beads
- Wax pen aka tjanting tool
- Heating pot and heat source
- Pencil
- Dyes
- Paint Brushes
- Water pot for cleaning brushes between colours
- Water for washing fabric
- Sun or hair dryer
- Detergent
- Washing bowl
- Something that dissolves wax, it is suggested hot (boiling) soapy water will do the trick. Some people iron the fabric between sheets of newspaper but not sure if that will make the fabric dirty from ink.
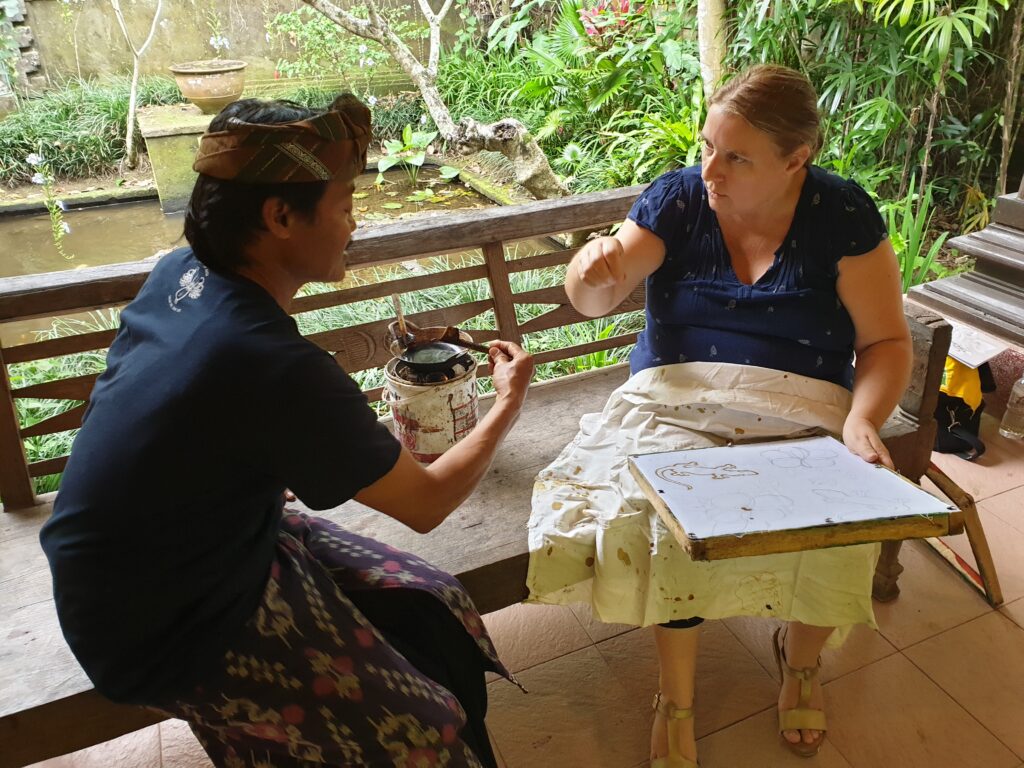
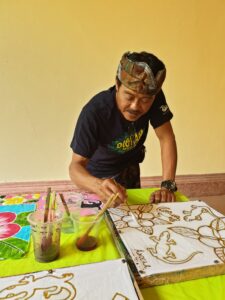
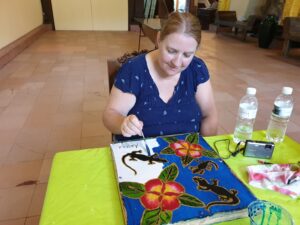
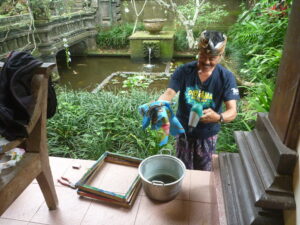
Here I am, deep in concentration as our host and teacher gives me the rundown on how to use the special wax pen, the tjanting tool.
Procedure
There were at least 8 steps to producing our Batik pieces of art.
- Drawing our design on the fabric
- Pouring the wax outline onto the fabric
- Dyeing the areas to be coloured
- Washing the fabric
- Drying the fabric
- Washing off the wax
- Drying the fabric again
- The finished product
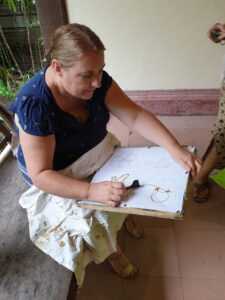
1. Drawing our Design
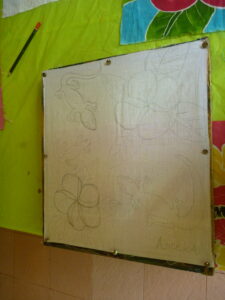
The cotton fabric with the design drawn on it ready for waxing
Our teacher gave us a few designs to peruse so we could see what was possible and have an idea of what the finished product might look like if we drew it well enough. We were quite hopeful that we would produce something reasonably good.
The fabric used was just a simple off-white cotton, heavy enough that wax would not seep through, but if you would like something to look more professional, try this fabric. The fabric was stretched and attached to a wooden frame with thumb tacks to keep everything nice and tight. Then, with help from our teacher in how best to draw the object, we used lead pencil for drawing the outlines of the design where the wax would be placed.
Once we selected our designs, which I must say took a bit of time because we looked through nearly every single sample he had with him, we went ahead and drew our own versions. It was relatively easy to draw on the fabric and we did a pretty good job if I don’t say so myself. It didn’t matter if we made mistakes because the dye would cover those up for the most part.
2. Pouring the Wax Outline onto the Design on the Fabric
Awkward!
Next came the pouring of the heated wax along the lines we drew as our design. The wax would be melted off eventually, leaving white outlines and creating the distinctive Batik-look.
It was not so easy pouring the wax using the weird pen (tjanting tool) that was given to us. Our teacher made it look very easy, but once we got hold of the pen ourselves, it was pretty tricky.
It was held on a really awkward angle and had to be held just the right way to ensure an even pour. I don’t know how many times mine ended up too thin or too thick in places and just looked plain wrong, but we had our wonderful teacher to help us so it didn’t end up too bad.
Still Awkward!
It really was quite strange. You had to dip the pen into the warm wax from the heating vessel and then it was to be poured from a tip leading from a cavity that held the heated wax out through a small spout. It was almost like decanting from a miniature gravy boat in a way, but kind of backwards. Once we finished, thankfully our teacher touched up the areas that needed the wax to be a bit thicker to keep the dyes separated and prevent them from bleeding into other parts of the design when we got to that part.
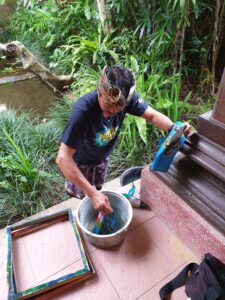
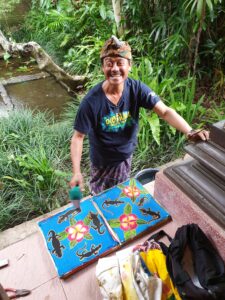
The wax heating pot and the wax pen I believe would be the most difficult items to obtain here in Australia, but it turns out you can use a double boiler or heavy base saucepan to gently heat the wax in much the same way as you would melt chocolate. I would probably use an old saucepan from a second hand store to melt the wax in so as not to ruin your own pans. But apparently Amazon has proper heating pots if you are interested in checking them out here. It’s important for the wax to be warm and not hot, approximately 80’C (170’F). It is said that you can use simple white household candles or candle wax beads melted down, or you buy proper batik wax slabs, and to just use thick and thin paint brushes
Our teacher going over the wax outlines to prevent bleeding of the dyes
Once we finished our wax pouring, our teacher had to redo all of our wax outlines to make sure they were all thick enough to keep the colours from bleeding into each other once we started dyeing the material. It would have been a disaster if he hadn’t. We noticed some of our outlines were really quite thin and I can’t imagine the mess that our pictures would have become if he hadn’t checked over our work. I know this is an important factor to watch out for, if ever I decide to try batik again here at home.
We felt a bit sorry for our instructor because our pictures were quite large and more intricate than the example pieces he gave us to look at for ideas. It all added on to the time our lesson took. Even with his expertise and how fast he was able to work it still meant we might push over the time our class was meant to take. But I’m really glad we did the patterns we chose in the end because they really came up stunning.
Yay. We finished our outlines.
3.Dyeing the Areas to be Coloured
Now to begin the inking process.
Next we painstakingly painted the pictures where we wanted the colours to be, remembering that there would be white areas left over after the wax came off. It was important not to use too much because the dye would bleed into the other colours or be too thick to apply the colour in different shade gradients. We took a bit of time doing this and ended up choosing to pay a bit more for our lesson because of going over our time slot. Luckily no one was waiting for the next class. We used the fabric dyes provided by the instructor, but thinking on how to attempt batik back at home, using basic tie dyes from a simple kit would work. You can buy dyes individually, such as this one, or look for something like this kit which is available in Australia. There are a few kits that contain different colours depending on your need and if you prefer.
Voila! All inking except the background are now completed.
The inking of the background begins. This looks darker than it will appear once the ink is dry and set.
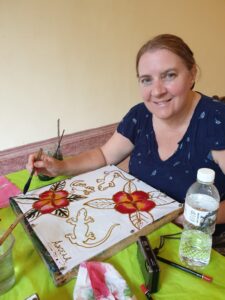
Woohoo! My sister (on the right) and I have finished the inking. The hardest part for us is done.
4. Washing the Fabric
The next step was simply washing the excess dye from the fabric. I think he only used cold or luke warm water at this point. I don’t think he wanted to wash the dye out or the wax off. He simply placed it in a pot with water in it and swished it around in the pot a bit before taking it out.
It’s bath time for the fabric at last!
5. Drying The Fabric
Then it was a simple matter of laying the fabric out to dry. He told us normally they would dry it in the sun because it was always so warm there and it wouldn’t take long. But this day the weather was a bit cloudy and so he opted to use a hair dryer. Which funnily enough was the only modern utensil there and we were surprised he had one on hand. I think this stage was meant to ‘fast’ the colours of the dye onto the fabric.
What? You have hair dryers here? Isn’t that cheating? Our teacher laughs about using the hair dryer instead of the sun to dry our artwork.
6. Washing Off the Wax
Then it was time for the second wash where he used warm water and detergent to wash off the wax and more dye. We noticed the colours looked paler but still vibrant and more like the colours of the example pieces of art that we originally used to decide upon our designs.
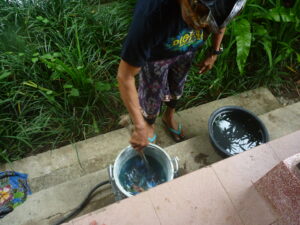
Wash again!
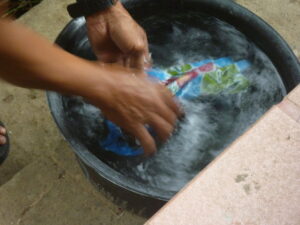
Keep washing!
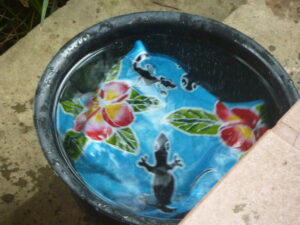
Leave it in for a bit of a soak. You can see here that the wax has been removed leaving the while outlines.
7. Drying the Fabric Again
And now it was back to drying the fabric for a second time now that the wax was washed off. You can clearly see the white lines left by the removal of the wax, giving the art work it’s classic batik look.
And there’s that hair dryer again
Nearly dry thanks to modern technology
8. The Finished Product
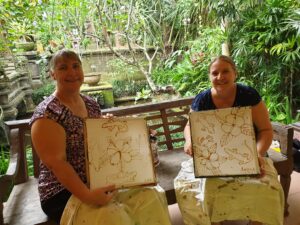
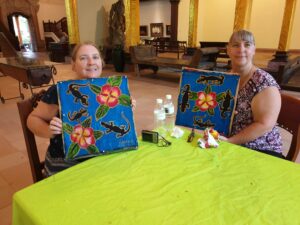
Then all that was left was to wait for the fabric to dry again and take it home ready to frame. Mine is the one on the right and my sister’s finished work on the left in this picture. And we finished off our wonderful experience with a lovely lunch at the restaurant on site.
And wow, would you look at that? I must say they are looking quite good while they are hanging out to complete the drying process. Mine is on the right, my sister’s on the left.
I have to say we are most proud of these works of art, even if they have simplistic designs, it was still not an easy task to actually draw the frangipanis and the geckos. Ours were odd sizes and shapes, some were too fat or thin. Some were not exactly to scale and the artist who taught us had much better art work, but nonetheless, they are ours and we loved what we produced that day. I think if I was to think about which was the hardest design to draw, I found the frangipanis the most difficult. When filling them in with ink, I think I didn’t allow enough room to bleed, whereas my sister did a fabulous job on hers, seeming to get just enough dye in just the right places for the frangipanis to look more realistic. I liked the non-symmetrical side of my own design.
In Terms of Therapeutic Art Activities, Batik Was Definitely a Winner
Would I choose to do Batik again as an art or a therapeutic activity again? Yes, I would certainly venture down that path another time. It was a thoroughly enjoyable, and most importantly, a doable activity. I might even go to the same art gallery in Ubud, Bali to do it again if I ever get back there. I would love to try to improve on the next piece of work I endeavoured to do. As far as doing it here at home, I think one day in the not so distant future, when the grandkids are a bit older, I would not be opposed to setting up a little studio where I could try my varying interests in art styles and batik would be on that list. Anything that I call therapy is a good thing in my books. I hope you try it one day too. It doesn’t have to be a huge intricate design. In fact I prefer our simple pieces to anything that would become too intricate.
Thank you for your interest in reading this article and I sincerely hope you give different forms of therapy, such as doing Batik, a try.
Warm Wishes,
Ange
Products Linked to in this Article
Just a note here that my articles might sometimes contain affiliate or brand partner links which, should you purchase something through a link I share, provides a small payment to me to help fund my website, financially support the resources I buy to use and to suggest to you, and are often spent on the well being and homeschooling for my grandchildren. I gratefully thank you in advance if this relates to you. Occasionally, products that are linked to might be out of stock but will be restocked as soon as possible. Please check in again or contact the company to ask when they are due to be restocked. This company also have great deals very regularly, I but a lot from them. Take advantage of these specials whenever you can.
‹ How To Be Happy In Your Life! Harry Potter School – Design Own Homeschool Curriculum ›