How To Make Your Own Speed Art

Cropped image of the 3D art work I did in the speed art class
After seeing many artists whip up a painting in record time, I have often wondered if it was easy to learn how to make your own speed art and use it for a fast and easy form of relaxation or therapy. If it was simple and hassle free, I believe it would be a fantastic way for unpaid Carers to maximise their limited time in a fun but therapeutic way, and have something to show for it at the end of just a few short hours, even minutes as they get faster. Just recently I had the opportunity to find out after being invited to attend a class teaching Carers how to do a simple form of speed art.
SPEED ART IS AMAZING TO WATCH!
Have you ever stopped at a street or beach market where the focus is on arts and crafts, just to watch an artist at work and see them put together an amazing piece of work in just minutes? One time I saw a person paint an entire large scale landscape painting in about three minutes, and it was a fantastic piece of work too. I was so impressed by how amazing it looked and could not fathom how something that was a blank canvas could suddenly become a complete picture before my very eyes in a matter of moments as I stood by watching.
 Looking at the techniques used and the tools, I realised that if I learned the basics, it could easily be applied at home as a form of art that I could do quickly and easily when I found time. I could see that much of it revolved around how the artist chose to put the paint on the canvas, whether it be a brush or sponge or something else, that was instrumental in how quickly the work evolved into a painting.
The reason I had not tried it before though, was because I never believed I had the imagination to deliver a pretty landscape like these professional artists. I have trouble creating an image in my head first, let alone being able to transfer it into a real picture, as a result, I just never thought I could do something like this. I am talking with respect to landscapes because I am more interested in them than people, because I am really bad at drawing people.
ART HAS CHANGED A LOT OVER THE YEARS
The way people paint these days has come a long way from the treasured oil paintings from the days of old. Times have changed and where once the materials required to produce the Mona Lisa for example, were more expensive and harder to come by, in today’s world, access to quality paints, brushes, canvases, paper, and other tools, is widespread and affordable for most people. This has made it much easier for more people to take up painting as an art in either a profession or as a hobby in modern times.

Leonardo Da Vinci’s famous painting of the Mona Lisa.
I Could Actually Call Myself A Professional Artist You Know!
True story! I love art and it was one of my favourite subjects, so much so, that I chose it as an elective in later years at school. But over the course of my life, and with my need to be a Carer, I have not had any time to pursue it further. I don’t believe I am a brilliant artist, but in my final year of high school I actually sold three pieces of my artwork as a set to one of my teachers, which paid for my driving lessons when I was learning to drive in my late teens. I was so excited that I ‘sold’ my work and selling work usually means you are a professional in your field. Yeah right! That’s a dream, but for a brief moment, that is what I was.
Those pieces, much like the art work of the famous artists such as Michelangelo, Monet, Renoir, and Vincent Van Gogh, among many others, took a long time to produce. I spent the better part of a year from planning and starting my art series, to the final completion for the art show between all of the state schools where our art was displayed in a special gallery. I am extremely happy to tell you that I even got a recognition for it as “Highly Commended”.
I would dearly love to go back to working with that form of art, which was a combination between the concepts of Pointillism, such as the art by Georges Pierre-Seurat and Paul Signac, with the addition of screen printing. For examples of Pointillism, see the following 2 images.
Georges Pierre-Seurat – A Sunday Afternoon On The Island Of La Grande Jatte

By Georges Seurat – twGyqq52R-lYpA at Google Cultural Institute maximum zoom level, Public Domain, Link
Paul Signac’s – In The Time Of Harmony. The Golden Age Is Not In The Past, It’s In The Future.

By riha-journal, Public Domain, Link
I particularly enjoyed the Pointillism aspect of working on my art pieces, but did not use paints as the original artists used. Instead I opted for fine and bold felt tip pens, and spent the most time on that part of my work. But my goodness, working with tiny little dots to create pictures was very time consuming and hard on the hands.
I look at my life nowadays and just know that it would be a long time before I can go back to art like this while I am a Carer. Maybe I never will, because of the time it would take to complete just one piece of work. I wouldn’t get to feel the satisfaction of a finished product for a very long time. Which is one of the main reasons I was drawn to attending the speed art class I was given the chance to experience. I was hoping to learn how to paint those gorgeous landscapes that I had seen in the markets.
More on this shortly but for now, here is a collage of the artwork I did in high school, the first three are the art series that I sold to my teacher. The series represented “Jealousy”. The last piece was meant to be an asteroid’s imminent crashing into a planet. Please forgive the poor quality of the images, the camera used to take the photos was a very old one, it didn’t have the quality I needed to truly capture the artwork. The end result was blurry and these are the only photos I have of my work and they had deteriorated somewhat.
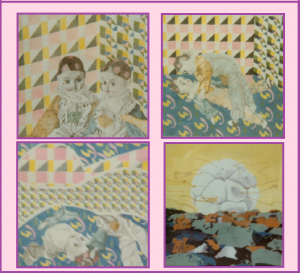
A collage of the art work, my 3 piece series and 1 individual piece, I did in year 12 when a teacher bought my work. Excuse poor quality photos.
Carers Don’t Be Disheartened Thinking You Can’t Do Art, Or Don’t Have Time
Art is such a great form of therapy and one I highly recommend, but as a Carer, and other Carers and busy people will know exactly what I mean, finding the time to actually do your own painting or other form of art is most likely going to mean you won’t get started. It usually means getting set up with a lot of accessories, finding a space, having access to an easel, buying a huge range of oil or water colour ranges, brushes, canvases, cleaning solutions etc, before you can even start. Because of this, it makes it difficult for Carers to consider doing painting as a therapy because by the time you get it all set up, it will be time to get up again to be a Carer. That is assuming you have actually managed to find the time to begin with.
It’s important to note that there are quite a few different forms of speed art including a variety of media that each have differing time requirements. It’s just a matter of knowing which one will suit you and if you can spare that amount of time for it. In this article we will be discussing the speed art class I attended and what media and tools were used. This is because the class took only about 2 hours from start to finish and we walked out with a completed piece of art. This time frame I would consider to be quite suitable for what I am looking for in terms of how long I will have to spare, or can find time for, to spend on speed art. This will change quickly because once the basics are learned, you will get much faster at doing your art.
My Speed Art Class In A Nutshell
My speed art class was a painting class using acrylic paints. What made it fast was that all the equipment was simple and minimal and we needed very little work space. Perfect for what I would need as a Carer to be able to set up, get a piece of art done, and pack up in very little time. The only thing I was slightly disappointed about, but not complaining because this art class was a free event for Carers, was that due to their advertising, I was expecting to be learning how to do a speed landscape, which was of particular interest to me. However the timing of this class happened to take place the week before Easter in which the lovely lady who taught the class had decided to make it an Easter themed class.
Even though I didn’t get to paint what I was expecting, I still thoroughly enjoyed the class, learned a lot of the basics that I will be able to translate to a landscape anyway, and came away with a lovely Easter decoration that I will be able to use in years to come as a display. Apparently they will be doing another class either later this year or early next which will be landscapes, so I plan to attend that one too, if possible. Otherwise, this lady runs classes that I could pay for if I really wanted to learn something now. On the other hand I am sure there would be YouTube tutorials to teach some of these ideas as well.
I will look at ways to improve on the set up and supplies used to better suit my own goals, which is to paint a series of 7 landscapes each focusing on a different colour of the rainbow. This is in preparation for adding colour therapy, or chroma therapy, into the healing potential of my home environment which I have plans to write about in another article.
Our Equipment
As I said earlier, the equipment and tools we used were very simple. All that this form of speed art required were the following easily accessible or cheap to purchase:
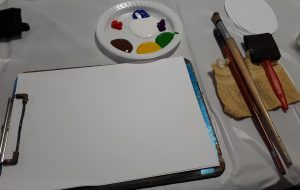
The simplest of materials were used
- A Plastic table cloth or sheet (to catch spills and for easy cleanup)
- A Clipboard (To hold the paper in place)
- A piece of A4 sized printing paper
- 2 Paint brushes, one thick, one thinner
- A wide flat sponge with a handle
- An old rag (To wipe and dry brushes in between paint applications)
- A glass filled with water (For cleaning brushes)
- A plastic disposable plate
- Scissors (To cut a slit)*
- A grey pencil (for drawing the basket on)*
- A squirt each of 7 different acrylic paint colours, in this case, we used yellow, blue, red, green, purple, brown, and white, but we could just as easily used the 3 primary colours of red, blue and yellow, then a white, and we could have made all the other colours anyway.
- We also had several oval shaped pieces of paper in 3 different sizes that the lady had already cut out for us and she also provided a cut out of a semi circle shape that we were to draw around a bit later.*
*Some of these materials would not be needed for a landscape or still life painting but because we were doing a 3D style piece they were added in.
STEP 1- STARTING WITH THE BACKGROUND
The very first thing we needed to do for our painting was the background which seriously took less than a minute to do. Our teacher showed us how to do it quickly by dipping her flat sponge into the blue paint as an example, and then dipped just one tiny corner of the end of the sponge into the purple paint. She proceeded to brush in one direction from left to right across the page horizontally, then lifted her sponge up and brought it back to the start of the page moving down it a little to start the next stroke. She made sure there was a slight overlapping between the new stroke and the first brush stroke before brushing across the page and continuing down in the same manner all the way to the bottom. This gave a really nice effect of the two colours intermingling and causing the background to have a two-tone appearance.
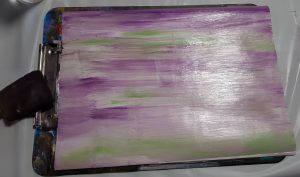
My own triple coloured background
When I did my own background, I used purple, white and green. I added a colour to each side of the sponge to see if I could see a slightly different result. What I ended up with wasn’t quite what I had in mind but it was very close.
I realised the white did not show up as much as I had envisioned. This is due to not having done it before and so my hand was not as steady as it could have been. Also my technique in terms of how I brushed and where I placed the sponge before brushing across the page blended the trio of paints a little too much for my preferences and the pressure used to deliver the brush stroke may also have contributed. With practice I will get much better at this. Once we finished this part, we set the backgrounds aside to let dry and started work on the next step.
STEP 2 – PAINTING EASTER EGGS
The next step involved using the ready cut out oval shapes to create our own individualised Easter eggs. The teacher showed us some examples of colour schemes to use and suggested we use the same technique as we did for the backgrounds but to play around with colour schemes along with those suggested.
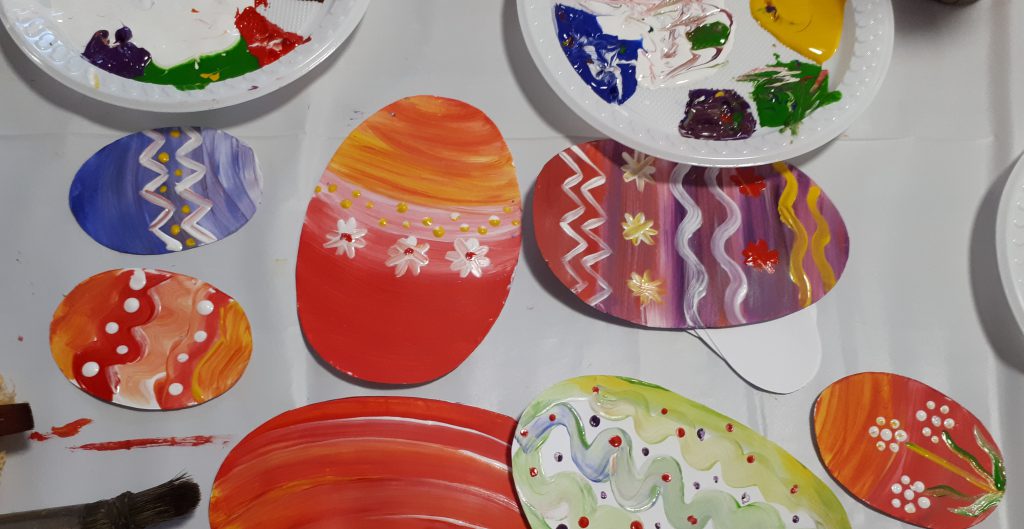
Examples of patterns, designs, flowers and backgrounds as provided by the teacher, some were my own ideas.
These examples were quite simple techniques. If you look at the above image at the large orange and red Easter egg, the one right in the middle, the white flowers were done simply using the small brush, adding white paint to the bristles and then just bending the bristles down flat on the paper and continuing to make it look like an asterisk.
Looking to the lower right hand side, there is another orange and red smaller Easter egg with little dotted flowers on it. These were simply done using the other end of the small brush. Add white paint to the tip and just dot it down in a circle shape using 5 or 6 dots, and then dot in the middle, which could have been any colour. The stems were done using two colours on the brush, on opposite sides of the brush and just painting a line.
With these styled backgrounds using white in the patterning really stands out and is quite effective. There were many other examples that we were shown but unfortunately I didn’t take a photo of them, which I now regret. I would have like to have kept a photo of them so I could use the ideas in my future work.
STEP 3 – ADDING THE BASKET FOR THE FINAL TOUCH!
Part way through our egg painting, we checked to see if our backgrounds were dry. Next it was time to use the semi-circular cut out as a stencil to draw the outline that would become the basket at the base of the page. One the outline was drawn it was a simple case of painting it brown within the half circle with the larger brush to cover the broader area more rapidly, but you could use any colour that you desired. There is no reason why a basket has to be brown after all.
Lastly, we used a different colour on the larger brush and just flattened the brush down to the paper along an imagined horizontal line, lifting it up and placing down again a short distance along, and repeating until we got to the end of the line. After which we dropped to the next area imagined line and alternating the placement of the brush to make the paintwork look like a woven basket. Once finished, we set it aside to dry and continued doing our Easter eggs.
When it was dry, it was a case of cutting along the top of the basket to create a slit in the page and we inserted our painted Easter eggs from large eggs in the back, to the middle sized eggs over them so that they overlapped the first, larger eggs. The smaller eggs were then placed over the top of the other two layers, all of them overlapping the previous layer and the bottom most layer. This all gave the piece of art a 3D (3 Dimensional) look.
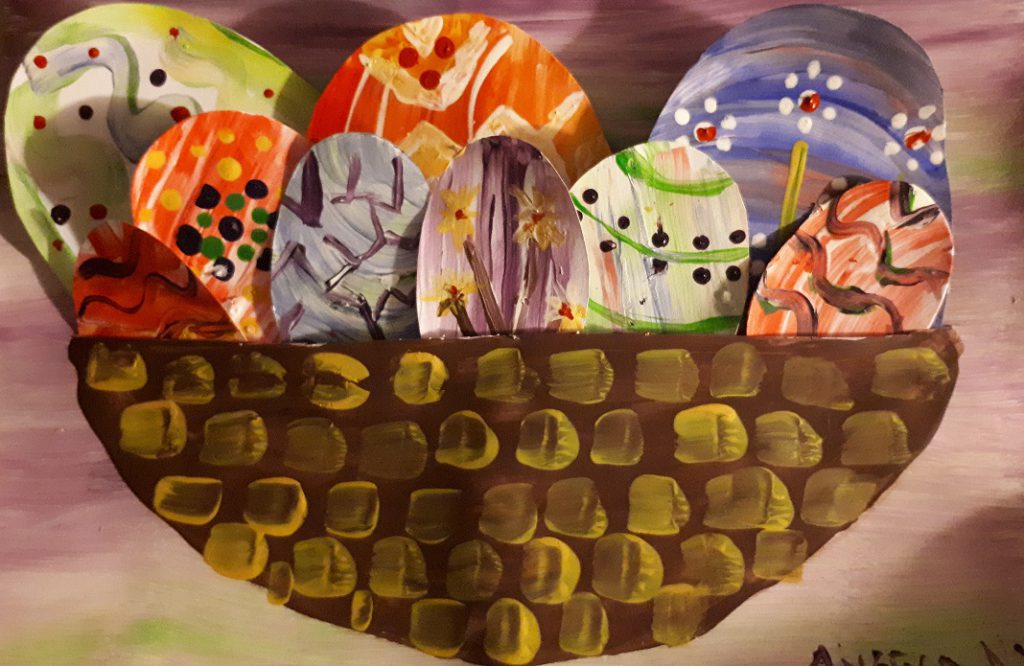
Here is the 3 Dimensional look to the art work and how it looked as a card
Once home, if we wanted to, we could glue or stick the eggs down in the position they were, otherwise keep them loose and rearrange them to create different designs. Due to it being painted on paper, and to preserve my work better, I will probably laminate the piece of speed art that I created. That way it will stay safe in between Easters from one year to the next. Our particular pieces doubled as Easter cards if we wanted to give them away. Our art was done on larger paper that had been folded over to make a card
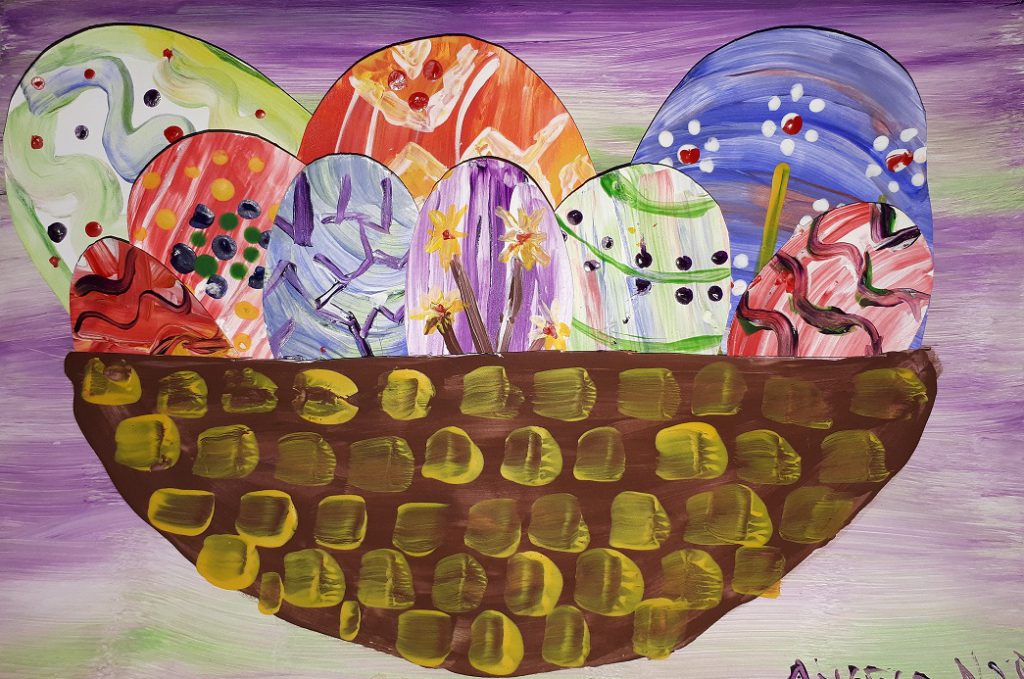
This is how my art would look flattened and laminated
All in all, it was a very successful day and while it’s not something that would interest a buyer of paintings to add to their collection so to speak, with a bit of practice and some more techniques learned, I would be happy to display these in my own home.
STEP 4 – OH, THAT’S RIGHT, WE’RE FINISHED ALREADY!
That’s how quickly this work took and what made it take as long as it did was the actual cutting along of the slit at the top of the basket and painting and placing the fiddly eggs that didn’t stay where we wanted them to stay. If we had painted just a landscape, we would have only been working on a single flat piece of paper.
NOW LET’S SCALE IT UP A LITTLE!
Let’s look at something a little different and think of ways you might be able to add a little money to your struggling finances. If you considered shrinking this art work down to about a quarter of the size, there could well be a market for card designs for Easter and other occasions using this design or similar. Handmade cards are something that a lot of people prefer buying these days and are quite happy to choose this option to be a little different. You could create yourself a small business selling cards using the speed art technique and 3D styled cards. Or if card making in general interests you, there is a kit you can buy here to get you started if you don’t want to do the actual speed art technique.
Card making can take time if you are going to the trouble of using methods where items such as scrap booking tools or cut outs and trimmings might be required, and there is often the need to wait for glue to dry, adding to time spent on each card and taking up your precious free time. Incidentally, I do scrapbooking for therapy also, but to accomplish anything I need to set aside many hours or have a work station set up continually, which is difficult in my current home where there are just too many people living here. But you have just been shown how you could, if you set your mind to it, create small speed art versions of greeting cards and not have them take a very long time at all to produce.
Why not make all of your own greeting cards for birthdays, Christmas time or special occasions? You can be benefiting from the therapy aspect, and also saving yourself valuable time in having to go shopping for them. I can also think of a few more ideas, such as little motivational quotes on a pretty background, or just a word that might represent something, such as love, hope, dream, etc. Keeping it small will reduce any potential stress that might come from owning a large business, and it can go a long way to pay that excessive electricity bill, or save up for that holiday that you have always dreamed of.
Now Consider This!
Why not go one step further if you can see value in this idea, and have a look into the cost of holding a market stall in your area, or connect with schools for their school fetes or fairs? You could advertise on those customer boards inside many small shopping centers where they allow you to place business cards or notes about your business. Now I know many of you have trouble leaving the house to go and set up a stall somewhere so you could also look into selling them online by creating a website.
For more information see my article here that talks about learning how to create a website in moments and then how to work with it, which also opens up a range of other possibilities too. There are websites such as Etsy, or something like it, where people sell their crafts online as an option too. And let’s not forget that you could always just sell them among your friends using Facebook or Instagram by simply posting pictures of them.
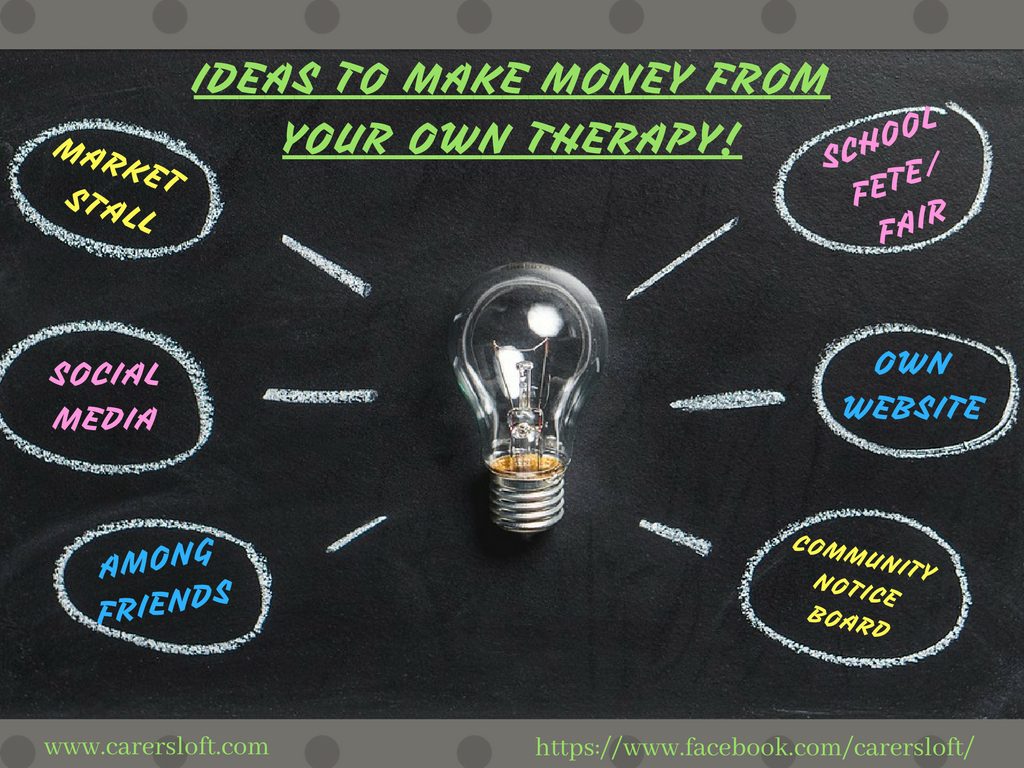
Why not use your very own art therapy work to make a little money on the side?
What If You Are Stuck At Home Often And Struggle To Get Out And About?
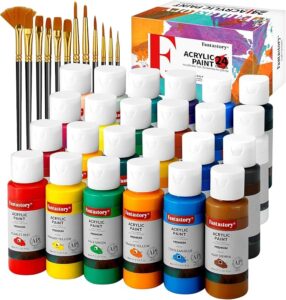
You can buy plenty of art supplies from Amazon. I find kits are the best way to go if you are only just beginning, often containing the paint, palette and brushes. You don’t even need to leave the home to purchase. I get most of my supplies online now.
So now you’ve been given some ideas as to how to make your own speed art using the medium of painting, and also how to potentially make money from it. What about those of you who struggle to get out or leave your home to actually go and buy the supplies you need to actually use speed art as a therapy? Even if you are only planning to use the basic materials that have been suggested here, you will most likely have to buy some of it and it may be difficult for you to obtain what you need if you can’t get out much.
I know, because it happens to me quite a lot. There are many times that no sooner have I got out of the car at the shops and not even walked in yet, next minute my daughter is already on the phone asking how long I am going to be because she needs me for something. It makes it difficult to get just the basic shopping done sometimes, let alone look for something specific where you may need to try a few different shops to find all of the items you need. There has been many a time where I have had to forego shopping completely due to a care need of hers, which of course as her Carer, takes precedence, however inconvenient. This has its own associated problems, especially if you are being relied upon to cook dinner only a short while later and there is very little food in the house.
You may prefer using the correct products for your art, such as using proper paint pallets instead of a plastic disposable plate, you may wish to use canvas instead of paper and an easel instead of a clipboard, or you may simply prefer working with watercolours or oil paints. Like me, this may be important to you if you are planning on displaying your art in your home, or perhaps going down the professional route where you might need materials of higher quality and perhaps would prefer to get them all from the one convenient location and not have to leave your home.
If either of these situations describe you, then there is a simple solution. Save yourself the grief and do what I do – order online. That way you can shop at whatever time of the day or night you are able to, you can spend time browsing and gathering what you need together in your cart and you can have a running total to see how much you are spending at any given time and the best thing yet they will be delivered straight to your door and in the case of ordering from a supplier in your own country, within days sometimes. And you didn’t even need to get dressed if you didn’t want to. I love shopping online and often use it buy other things, like my Christmas, Birthday and Special Occasions presents. I’ve even bought appliances online and also computer items. It’s a good idea to check the reviews of the company you wish to purchase from to make sure they have a good reputation to begin with. Shopping online saves me so much time as well, something that we can’t get back once spent and in our roles, something that is very elusive to find and you probably would prefer not to waste it.
In Closing
I hope you have enjoyed reading this article and gained some great ideas as to how art can be both therapeutic and also potentially financially beneficial if you choose to go down that path. Either way, only good things can come from using art as therapy, and speed art is a great way to use your limited time and still get the benefits of this therapy. I’d love to hear how you are going with your own work once you get started. Why not paste an image of your artwork in the comments section below. If you can offer any other suggestions, I would be honored to hear from you too.
Enjoy your newfound art freedom
Warm wishes
Angela
‹ How Is The News Bad For You? The Dark Side To Facebook ›